Lilypie Fourth Birthday tickers

Lilypie - Personal pictureLilypie Fourth Birthday tickers

Tuesday, October 30, 2012

Robin Hood Halloween!

I did something I thought I would never do this year. I actually made Kydan's costume! Thankfully this costume had no sewing invloved which is why it turned out looking decent! :)

I chose Robin Hood, unfortunately, this will probably the last year that I will be able to choose what he wants to wear as I am sure next year he will have more of an opinion.

It was quite simple to make....

1 green shirt- dollar tree $1
1 yard of brown felt- walmart for about $4
feathers- Michael's $2
sticks- free (just find a tree)
twine- dollar tree $1

$8 total...not bad!


I found a tutorial on You Tube on how to make a robin hat. not hard to find, just type in how to make a robin hood hat.
for the fringe on the sleeves and bottom of the shirt i just measure the length I would need and pretty much just guessed on how far apart I wanted the spaces to be. I did the same thing for the cape. I just held the fabric around his neck and cut the length i wanted it to be.
Here is the website for the bow and arrow....http://www.4tunate.net/2012/10/simple-outdoor-adventures-for-boys-day-14-make-a-bow-and-arrow/

add green or brown pants and you got yourself a little Robin Hood :)

Thursday, October 11, 2012

Fun Snacks


Banana Bread peanut butter and marshmallow sandwich!
 Peanut butter and marshmallow cream in between two slices of banana bread and microwaved for about 15 sec. I also put some mini chocolate chips in between on of the sandwiches and that was amazing!


A healthier snack...Peanut butter granola. 

Preheat oven to 325
line cookie sheet with foil and little grease

2 TB peanut butter
2 TB honey
1/4 tsp cinnamon
1/4 tsp vanilla extract
1 Cup oats

Optional add ins:
white chocolate chips
mini chocolate chips (or regular)
apple slices
banana slices
m&ms


In a microwaveable bowl, place peanut butter and honey and microwave until peanut butter is melted. Stir.
add in cinnamon and vanilla. Stir.
Add in oat and stir until oats are completely covered in peanut butter mixture.
spread out on cookie sheet.
bake 7-8 min.
Once cooled, add whatever add ins you would like or you can eat it plain!


Thursday, September 20, 2012

Learning With Food

To Help Kydan learn to recognize his name and the letters in his name, we made cookies! Any excuse to make cookies is a good excuse and since both Kydan and I love cookies I knew it would be a great way to get him to cooperate! We also learned A B and C since those are the letters he is learning at school this month.
For this activity I made Chocolate Chip Cut Out Cookies. I used the recipe from this website....
http://www.chocolatemoosey.com/2012/07/08/chocolate-chip-cut-out-cookies-for-sundaysupper/

Getting ready to go in the oven!


Yummy vanilla milkshake to go with the cookies!


 A B C with yummy chocolate milkshake


Kydan enjoying his snack

Just a little fun I had with Picasa and Kydan's name :)


Sunday, September 16, 2012

More Creative fun!


 Here are a few of the things I have been keeping myself busy with this past week.
Me and a friend went to the dollar tree this past week and it took all our strength to not buy a TON of stuff. It was like craft heaven :) In the end we only bought some felt, a few storage boxes, and I bought some clothes pins.
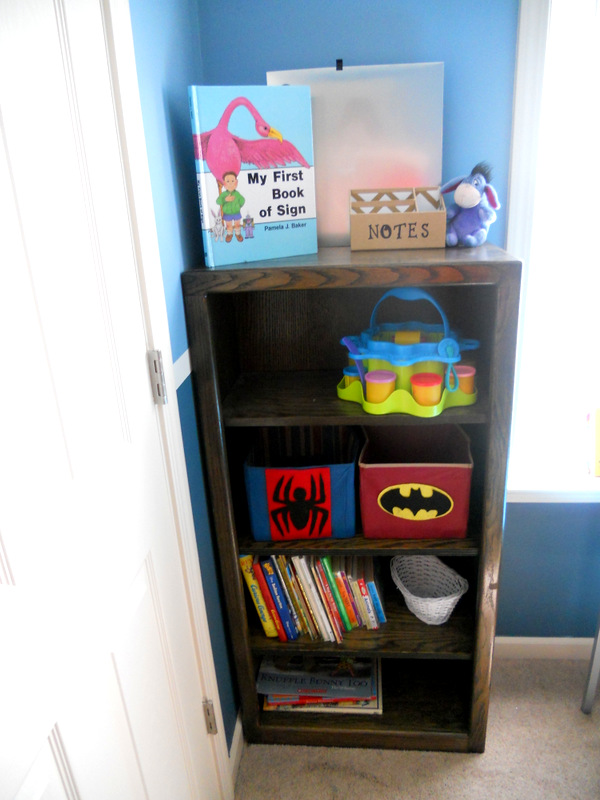
With the felt we cut out Super Hero logs and hot glued them to the storage boxes we bought. This was an idea we found on pinterest. I think it turned out pretty nice.
Here is the link to the website we got the idea from: http://sugartotdesigns.blogspot.com/2011/10/superhero-bins-tutorial-and-printable.html

I also took an old t shirt and cut out a cap and placed a superman logo on it. I made the cap blue instead of red because I didn't have any old red shirts I wanted to cut up. This was also a pinterest idea. To see directions on how to cut out the cap here is the link: http://thesoutherninstitute.com/2011/03/super-hero-cape-and-power-cuff-tutorial.html/


I have also taken our spare bedroom and made it into Kydan's school/art room.  Here is how I organized his art supplies.


I love those shoe holders. We have one on like three different doors throughout our house!

Here is his art work display...


Also we were told at church last week to dress our child up as an animal because they would be learning about Noah's ark and Noah was going to come and collect the animals. It was a lot of fun seeing all the different animals at church today and I think it is a great learning tool to get kids involved like that. 
I was given a few plain white t shirts for Kydan a while back and have been waiting for an idea to use them for something so this was the perfect opportunity. I just bought some black acrylic paint that said it could be used on fabric and I painted some stripes on the shirt. The cutest little zebra was the result!

 It was a fun week!


Friday, September 7, 2012

Activities with a 3 yr old!

Being that Kydan is an only child he doesn't have any siblings to keep him occupied during the day...and I am not the most social person in the world so some days Kydan ends up watching TV way more than he should be. Thankfully, we were able to afford to send him to PK3 this year two days a week! So happy that he will be around children his own age and I hope he makes a connection with one or two :)
Kydan LOVES to help with everything from mowing the grass (I let him help me push the mower), to helping me bake. To help keep my VERY active boy from being bored these are just a couple of things we have done recently.

this is Gary and Kydan making a bird feeder out of a pine cone, peanut butter, and seeds.


Ok so I still don't know how to flip pictures on here so if anyone knows how, please let me know how you do it!
Here is Kydan eating a banana we covered in peanut butter and dipped in sprinkles. We used a cake pop stick for him to hold it so he wouldn't get too messy.


Here he was learning how to cut. The shapes he cut out he would then glue onto a piece of paper. Thought this was a nice activity in helping him learn how to cut and paste.


Learning the color red! They are learning the color red at school this month so I thought I would continue the learning at home on the days he doesn't have school. My son LOVES to pile things. He never really plays with toys, he just piles them in random places around the house. He has been doing this from the time he started walking. So added that to his learning process. I had him find objects that were red and then run to place it in the pile. Another incentive...at the end we would count how many items he found and he would get an M&M for each object he found. He found 8 red items!


Sunday, August 26, 2012

Hunger Games Movie Night with Hunger Games Themed DInner and Dessert!

So Gary and I are a bit nerdy and I am not ashamed to admit it! Sometimes it is nice to be a kid at heart and not act "mature" all the time. One should try to make life fun when one can because life itself brings many troubles and problems on its own!
Last night we decided to watch Hunger Games again and this time eat a themed meal with it! On Pinterest I found a recipe for Peeta's cheese stuffed rolls, and a recipe for an apple tart. The main meal was harder to find since in the book they speak of eating squirrle, rabbit, lamb, or a huge pig roast. We decided to go with sausage since it was the easiest and quickest thing to make that was part of a pig. :) 
There is a funny story that goes along with those cheese stuffed rolls. Gary was measuring out the ingredients while I was mixing them together. When we added the flour we couldn't understand why the mixture wasn't thickening and becoming dough like. The recipe said we should start Kneading after the flour was added, but ours was still in liquid form. After much mixing and still nothing, Gary finally mentions "this is flour, right?" and points to the clear container that I have powdered sugar in. So yes, we tried making our bread with powdered sugar the first time around :)


Thin French Apple Tart


For those of you who don't know we named our two cats after Hunger Games characters. We have a Katniss and her sister Prim Rose...Here is a picture of Primrose checking out Peeta's cheese stuffed rolls. Katniss came over later to check out Peeta's rolls but I didn't get a picture.

Here is the recipe for the Thin French Apple Tart:

  • 1/2 (15-ounce) package refrigerated pie dough (I made a homemade pie crust but this is what the original called for)
  • 1/4 cup sugar
  • 1/2 teaspoon ground cinnamon
  • 2 pounds Golden Delicious apples, peeled, cored, and thinly sliced ( I only used two)
  • 2 1/2 tablespoons honey
  • 1/2 teaspoon vanilla extract

Preparation

  1. Preheat oven to 425°.
  2. Place dough on a lightly floured surface; roll into a 12-inch circle. Place on a 12-inch pizza pan. Combine sugar and cinnamon. Sprinkle 1 tablespoon sugar mixture over dough. Arrange apple slices spokelike on top of dough, working from outside edge of dough to the center. Sprinkle apple slices with remaining sugar mixture. Bake at 425° for 30 minutes. (I only needed mine in 25 min)
  3. Combine honey and vanilla in a microwave-safe bowl. Microwave at high 40 seconds. Brush honey mixture over warm tart. Serve warm.
If you want to make the Homemade pie crust that my mom taught me how to make, Here is the recipe for that:

1 cup all purpose flour
1/3 cup crisco
pinch of salt
cold water

combine flour, crisco, and salt until crumbly. I just used my hands. Make a well in the middle of the crumbly mixture and pour a little cold water into the center. Mix together until the dough is all wet. If there are any dry parts, take out the wet dough and repeat the process with the water with the dry dough. Try not to Knead too much. Place on floured surface and roll out with a floured rolling pin.
 
Here is the link to the Original recipe:

Link to Peeta's Cheese Stuffed Rolls:


Saturday, August 18, 2012

Dinner and a Project

With the wonderful help of Pinterest, Kydan and I have been a lot more crafts/projects. Here is one of them that I thought I would share since I thought it was really neat and they came out pretty nice!
It was quite simple to make and cheap since most of the supplies can be bought at the Dollar Tree!
What is needed:
Frames-dollar tree
clear see through stones- dollar tree (can also use beads or buttons)
Hot glue- walmart, I know you can buy the glue sticks at the dollar tree, or any craft store
Elmer's clear glue- I got this at walmart
1.you take out the back of the frame and glass. Put hot glue around the edge of the frame and place glass back into the frame and wait till the glass dries in place.
2. Take the clear elmers glue and place a big blob onto the glass and spread around with a sponge brush.
3. place the rocks, beads, buttons, or whatever onto the glue.
4. I put more clear glue on in between all the rocks because I wanted to make sure they would stick!
That is all! It took almost 24 hrs to completely dry.
The website I got the idea from they also out a leaf in one of their frames....Kydan and I might do this some other time. Here are close ups of the pictures...sorry I didn't feel like taking the time to find out how to flip the pictures :)
This one kydan did:


this is the other one Kydan did:
this is the one I did:


Here is the website I got the idea from:
http://playathomemom3.blogspot.com/search/label/Clay%20and%20Crafts?updated-max=2011-12-18T15:12:00-08:00&max-results=20&start=12&by-date=false

Also this past week at Gary's work they through a back to school party and this is the dish I decided to make....Wolf Pack Sliders! It was very yummy!

2 lb ground beef 
2 lb sausage (the original recipe called for spicy sausage but I am not a fan of spicy so I just found something without a lot of spice. I literally stood there looking for sausage for about 5 min. because they have like a dozen different kinds of sausage!
1 lb velvetta cheese
1 onion (optional) I added it
1 green pepper (optional) I didn't add this but I might next time.
steak sauce
sliced cheese (optional)

Brown the beef and sausage with onion and green pepper....drain.
add in the velveeta until melted. Place onto buns or wraps.
I liked these better the day after. I think because it gave the velveeta time to sink in to the meat.
The original recipe didn't call for steak sauce but I thought it was a little bland so after I placed the meat onto the bun I put a few drops of steak sauce on and added a slice of provolone cheese. It was delicious!!!! this will be my go to recipe for big gatherings where you need to bring a dish. So simple, makes a lot, and tastes great!
here is the website I got the recipe from:
and the picture from the website (much better looking than my picture!):

wolf pack specials